
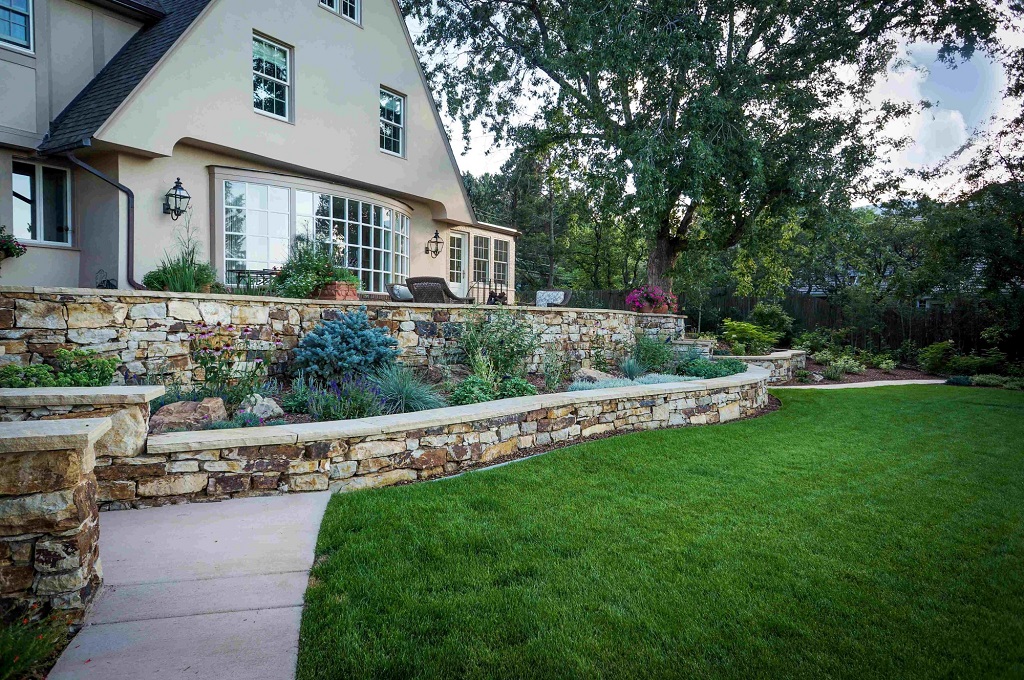
Building a stone retaining wall is a great method to provide a refined appearance for your landscape while controlling soil erosion. The retaining wall stone or retaining walls are used to build a transition from one level of the ground to another. Just by cutting into a slope and making level ground both below and above the wall, retaining wall stone can increase the amount of usable and flat ground in a yard.
When the retaining walls are not more than three feet tall, building this can be done by the DIYers, however, building the walls which are taller than three feet need professional help.
The easiest method of building retaining wall stone is to choose the dry-stack process that does not need a concrete footing like the mortared walls. These walls need no mortar between stones. This helps in reducing the hydrostatic pressure that is imposed by wet soil behind the wall, which is the most common reason for retaining wall failure.
A proper drainage system will help in maintaining the integrity of the wall’s structure as well as increase its durability. Backfilling the wall with rock helps in promoting drainage through the wall and prevents the soil from pushing through the cracks of the stones in the wall.
Instructions for Building a Retaining Wall Stone
1. Setting up a Level Line: A mason’s line and wood stakes are used to mark the location of the front face of the wall’s base. The string represents the front of the trench for the base of the wall. The width of the trench needs to be a minimum of half of the total height of the wall. For instance, if the height of the wall is thirty inches, the trench needs to be a minimum of fifteen inches in width.
You need to place a line level on the string, and then pull that string from one end, and before tying it off to the stake, level, and the line properly.
2. Organizing the Stones: You should organize the stones by shape and size, making different piles as per your requirements. It is recommended to use the flattest and largest stones to create the base of the wall and use the smoothest, widest, and the good-looking ones to build the top part of the wall. You should remember to mix the stones of odd sizes and shapes with the more regular stones to maintain the desired consistency.
3. Excavating the Area and Covering It: Now, you should excavate the area from the string toward the slope. It is better to dig down twelve inches into the ground and develop a flat trench for the gravel base. Then cover the excavated area with landscape fabric (remember not to use plastic) and put those perpendicular to the front area of the wall, and then extend several feet onto the upper level of the ground.
4. Building the Wall Base: Now, fill up the trench with five inches of gravel, which is compactible. Then rake the gravel to make it level and flat, and then tamp it with a power tamper or hand tamp. After that, add a one-inch layer of sand over the gravel, and smooth it up with a short 2X4 board.
5. Laying the Courses: Set up flat and large stones along the front edge of the trench to develop the first course. Remove or add sand beneath each stone, as required, and, thus, build the first course. Then, place the second course of stones on the top of the first one, staggering or offsetting the joints between the stones. This will make your wall very strong.
6. Start Backfilling: Fill up the space between the slope and the wall with drainage gravel, and tamp it with the hand tamps.
7. Installing More Courses: After the backfilling process, install third and subsequent courses of stone by following the same process. From the third course, install the long stones which are known as “deadman” stones.
8. Completing the Top Portion and Backfilling with Soil: Put the final course of stones to complete the top portion of the wall. Now, fill the top part with soil.
This is the process of building a retaining wall stone. This wall can enhance the look of your property.


