
A leaking shower head can be exorbitant and irritating. On the off chance that yours happens to spill, there could be one of the numerous reasons why. The arrangement is a lot simpler than you might suspect. You can recruit experts dealing with leaking shower repairs. Check the drains, the tubs, and the wall layers and surfaces of the wall to find out if the shower has started leaking from the wall.
Step 1: Turn off the supply of water
From the start, you can rotate the showerhead to stop the water supply so that you can check the head and investigate it. A leaking shower head can be brought about by stopped up gaps, coming about because of lime and other mineral stores that develop in the openings after some time. In case you’re uncertain what could be causing your leaking faucet, then start from here.
How can leaking showers be handled?
It’s a basic, modest fix that doesn’t expect you to clean up apparatus. Close off your water gracefully before you begin. The leaking shower repairs can be handled in one of two different ways: find and mood killer the shutoff valve to the washroom or mood killer the fundamental water line. It will presumably be simpler for your family to kill the water gracefully straightforwardly to the restroom as opposed to removing the flexibly to the whole house.
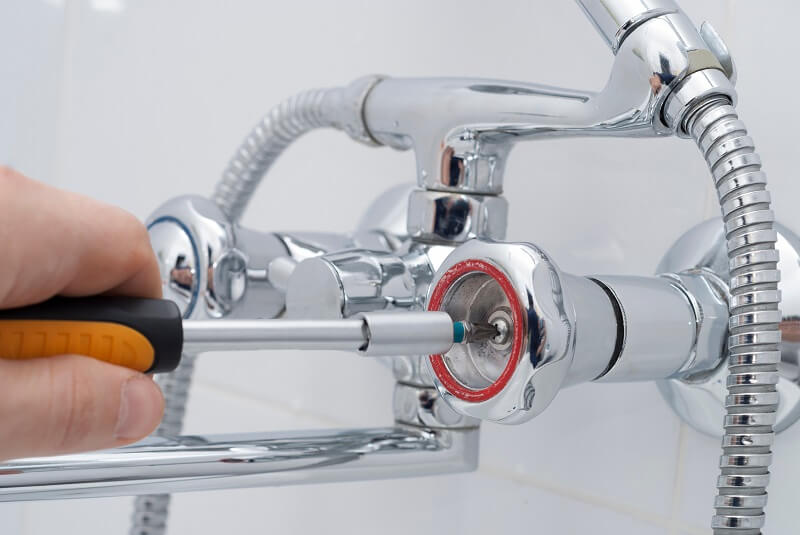
Step 2: Remove the faucet
You’ll need to douse and clean the pieces of the showerhead that have the lime and mineral deposition; you’ll need to expel it from the rest of the shower apparatus. The approach of doing this relies upon the make and model of your shower head. In a run of the mill dismantling, search for screws encompassing the shower head faucet or the showerhead itself to fix. When the screws are fixed, curve counterclockwise or pull the faucet or showerhead to evacuate.
The major step of the leaking shower repairs is arranging a container sufficiently huge to hold the faucet or showerhead. Fill your holder or sink with white vinegar with some coarse salt. The measure of vinegar you use ought to be sufficient to completely cover the faucet. Set a clock for 8 hours, or compute 8 hours from the time you set the faucet in the vinegar. While it’s dousing, the vinegar will work to break down the development and stores. The right water pressure can be revived when you have unclogged the entire faucet. Vinegar is a good cleaning agent but an excess of it turns out to be acidic.
Step 4: Brush the soaked faucet
Following 8 hours, the lime and other mineral stores have broken down. First, discover a toothpick or a nail sufficiently little to fit in the showerhead gaps. At that point scour the faucet clean with a solid plastic brush. You can likewise utilize an air blower to delicately remove the dirt as a crucial part of the leaking shower repairs.
Step 5: Take the trial before fixing it back
To check whether unclogging the shower, head gaps have completed the leaking shower repairs, append the faucet back set up. Walkout on the water gracefully to the showerhead, and guarantee the fixture is killed. On the off chance that you no longer encounter a leak, at that point you’ve tackled your concern. If your shower head is as yet leaking, at that point think about another conceivable purpose behind the hole. You should know how to hire the best plumbers for accessing the right fixing points and then how to finally seal the joints.


